
How to build GA4 events from the data layer

By Sam Dunkley|4 Sept 2024
Are you using the data layer to enhance your website data collection? If not, your Google Analytics property and marketing platforms might be missing out on some impactful data. Comprehensive, clean data provides better insights, leading to improved website optimisations and more effective marketing campaigns. Understanding the data layer and how to create GA4 events from it is the first step in levelling up your data game.
What is the Data Layer?
The Data Layer is a layer of data that sits above your website. It acts as a bridge, passing information from your website to Google Tag Manager (GTM) so GTM can understand what's happening on your site.
In technical terms, the Data Layer is a JavaScript object containing all the information you want to pass from your website to GTM. The object loads onto your website through the basic GTM script, but you can customise it for specific website interactions to enhance tracking beyond the default GTM capabilities. You can create detailed briefs for your developers, giving them specific instructions on when a Data Layer event should fire and what data you need to pass through it.
<!-- Google Tag Manager -->
<script>(function(w,d,s,l,i){w[l]=w[l]||[];w[l].push({'gtm.start':
new Date().getTime(),event:'gtm.js'});var f=d.getElementsByTagName(s)[0],j=d.createElement(s),dl=l!='dataLayer'?'&l='+l:'';j.async=true;j.src='https://www.googletagmanager.com/gtm.js?id='+i+dl;f.parentNode.insertBefore(j,f);})(window,document,'script','dataLayer','GTM-XXXXXXX');</script><!-- End Google Tag Manager -->
Why use the Data Layer?
You can fill the Data Layer with data that GTM can't usually access. This feature is the most significant benefit. It can hold extra product information or trigger events when your website code doesn't meet GTM's needs, enabling more sophisticated tracking. A great example of this is form submission. Do you have forms where the GTM form submission trigger doesn't work? A data layer event is the most reliable way to track this.
Other benefits of the Data Layer are:
- Robust data collection: Using the Data Layer, you're not relying on website HTML, which, as a marketer, is likely to change without notice and break your tracking. The Data Layer is dedicated to GTM without impacting the website layout, making it the most reliable way to collect accurate data.
- Easy tracking migration: Since you can customise the Data Layer, you can use the same event names across your old and new websites. The Data Layer won't change, and GTM doesn't require rebuilding your data collection from top to bottom.
- Fully customisable: You can name Data Layer events and variables to your specifications. This provides an excellent opportunity to make the Data Layer super easy to read, which makes onboarding new team members and agencies much quicker and saves time and money.
- Data Organisation and Consistency: It allows for a standardised way of passing information from your website to GTM, ensuring data is organised and consistent across various tags and triggers.
Need help with an analytics challenge?
How to build out GTM from custom data layer events
Let's say you've asked your developers to add a Data Layer event to help you track clicks on button links. The Data Layer event might look something like this:
datalayer.push({ event: "click_button", clickText : "CONTACT US", clickSection: "Do you need help optimising Google Tag Manager",})
Create your GTM variables
- Go to your Google Tag Manager container and navigate to 'Variables' in the left-hand menu
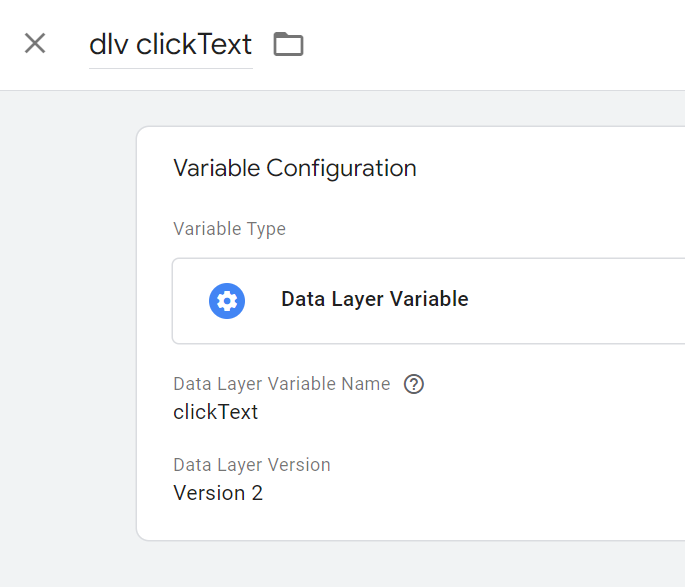
- Click 'New' to add a new variable and select 'Data Layer Variable' as the variable type
- Enter the Data Layer Variable Name field
- In our example, this is 'clickText' or 'clickSection' Name the variable (e.g.' dlv clickText ') and save
- Repeat steps 2-4 for all other data layer variables.
Create your GTM triggers
- Navigate to 'Triggers’ in the left-hand menu of GTM
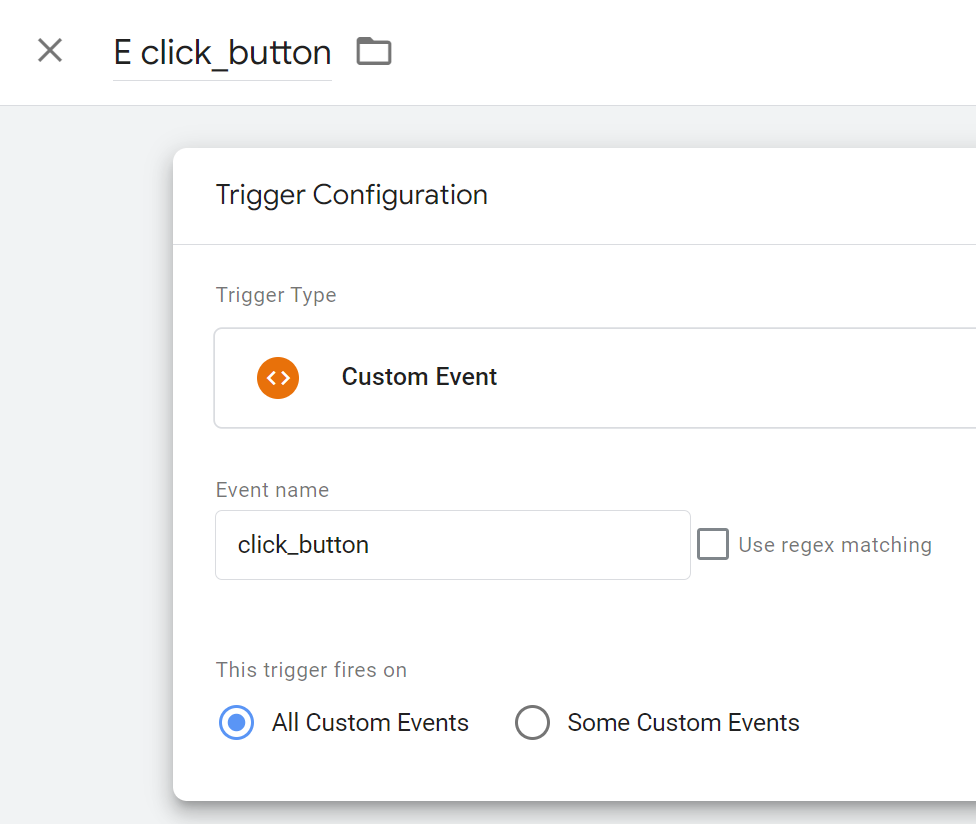
- Click ‘New’ to add a new trigger and select ‘Custom Event’ as the trigger type
- Enter the value of the Data Layer event
- In our example, this is ‘click_button’ Name the trigger (e.g. ‘E click_button‘) and save
Create your GTM tags
- Navigate to 'Tags' in the left-hand menu of GTM
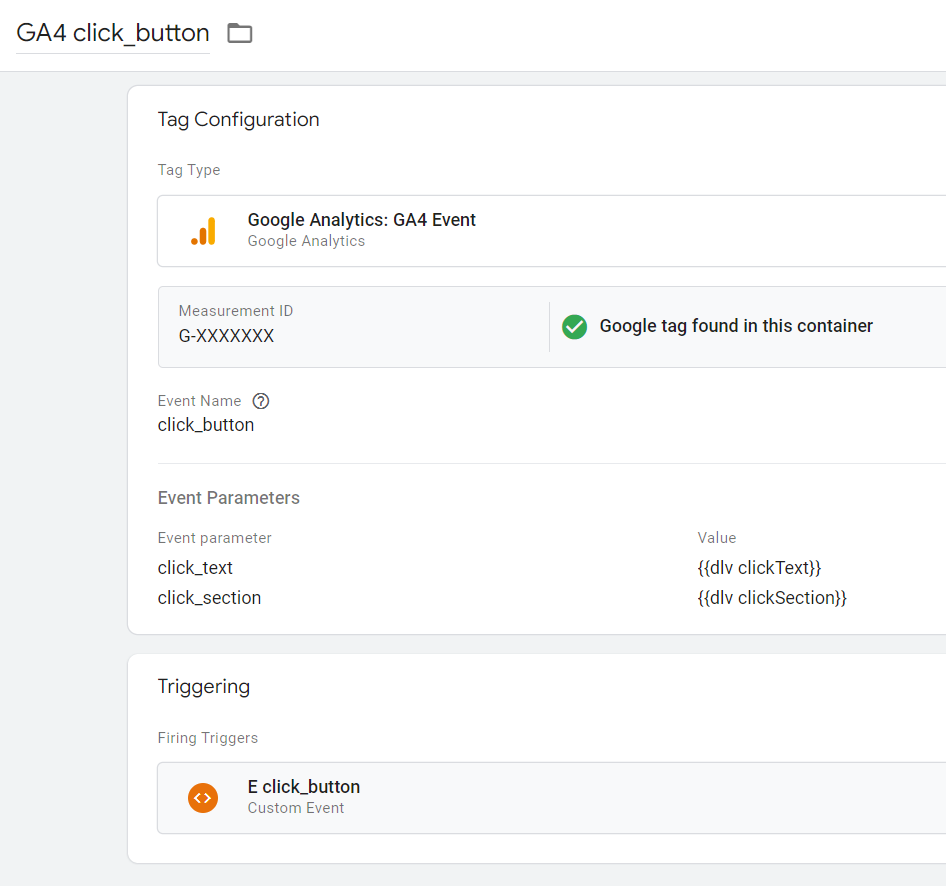
- Click 'New' to add a new tag and select 'Google Analytics: GA4 Event'
- Enter your GA4 Measurement ID
- Enter a GA4 Event Name (e.g. click_button). Note – The GA4 event name does not need to be the same as the data layer event name
- Expand the 'Event Parameters' accordion and click 'Add parameter'
- Enter the property name of your GA4 Custom Dimension (e.g. link_text)
- Set the value to the variable created earlier (e.g. {{dlv clickText}})
- Repeat steps as required
- Add the trigger created above
Now, test your GTM changes in Preview mode and publish the workspace. Customise these steps to match your setup, especially if you have workarounds for Cookie Consent Banners.
Create your GA4 custom definitions
- Navigate to your GA4 property and go to the admin section
- Open 'Custom definitions’ under the Property Column
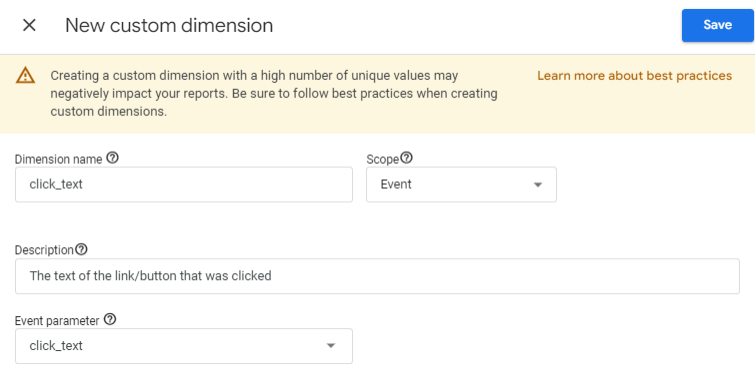
- Click ‘Create custom dimension’ to create a new custom dimension
- Check the Scope matches your tracking needs
- Enter the Event parameter field (e.g. link_text)
- Name the custom dimension how you’d like to see it in reports (e.g. Click Text)
- Enter a description for the custom dimension and save
- Repeat steps as required.
Building GA4 events from custom Data Layer events can significantly enhance your tracking capabilities. By leveraging the Data Layer, you can streamline tag management, keep your codebase clean, and ensure consistent and detailed data collection. Happy tracking!
Did you find this blog helpful? Share it with your colleagues.
Don’t forget to follow for more tips and tricks on mastering GA4, GTM, and BigQuery data engineering!