How To Speed Up WordPress With The W3 Total Cache Plugin
By Intern |23 Feb 2017
Before we start, some background.
(If you just want the guide, click here.)
A common misconception is that the WordPress platform is only good for sole traders, small businesses or bloggers. However it may surprise you to know that WordPress powers 27% of all websites including the likes of:
A particular challenge when running a section of your site (a blog, say) in WordPress is slow page load speeds. When the main site is operated separately from the blog, it is easy to optimise one and not account properly for siloes that will have different requirements. To make immediate improvements to your WordPress site or blog in under an hour, all that’s needed is the installation of a caching plugin and the correct configuration. Based on the tests you'll see below, you can see seconds shaved off the time a user has to wait before reading, engaging with and sharing your content.
Why is page load time important?
There are three key reasons:
- It has been proven time and time again that users will bounce from a page if it takes a long time to load up
- Google representatives such as John Mueller have suggested that webmasters should aim for a page load time of under 2 seconds
- For users on mobile 3G networks especially, Google has urged webmasters to aim for a 200ms TTFB (Time To First Byte)
What is the W3 Total Cache plugin?
W3 Edge sum up the plugin nicely on their website, saying: “W3 Total Cache improves the user experience of your site by improving your server performance, caching every aspect of your site, reducing the download times and providing transparent content delivery network (CDN) integration.”
How do i download it?
You can download the plugin quite simply from your site's WordPress Dashboard:
- Log in to your site's WordPress Dashboard
- Click on Plugins
- At the top of the page, click Add New
- In the search bar, type in 'W3 Total Cache'
- Find the listing that looks like this:
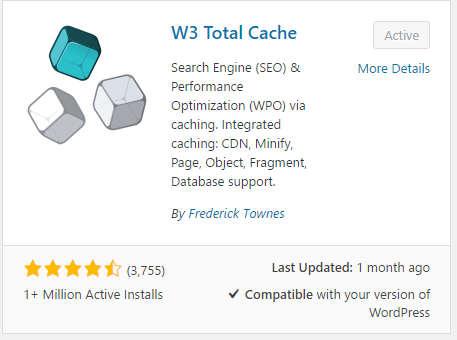
- Click the 'Install now' button in the listing's top right hand corner
- Click the 'Activate Plugin' button to enable it on your site.
Does the W3 Total Cache Plugin work?
In short, yes! I was as sceptical as you when I first stumbled upon caching plugins, but it really does work magic. The site I tested and implemented this on had an average page load time of 9.9 seconds. An hour later, once I’d installed the plugin and configured the settings, which I take you through at the end of this post, the pages were loading at 3 seconds – an astonishing change in such a short space of time. That’s an improvement of over six and a half seconds!
The test site's page load speed before W3 Total Cache:
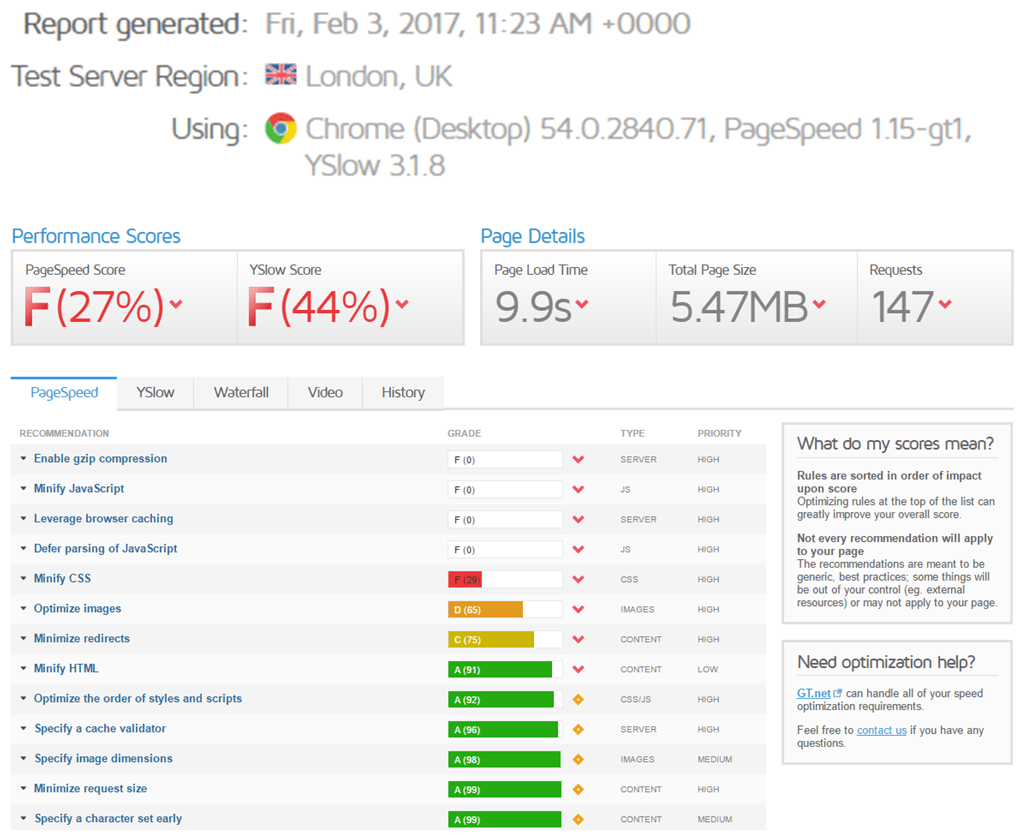
Key stats
- Test run: 11:23am 3rd Feb 2017
- Pagespeed Score: F (27%)
- YSlow Score: F (44%)
- Page Load Time: 9.9 seconds
- Total Page size: 5.47MB
- Server Requests: 147
The page load speed after W3 Total Cache had been properly configured:
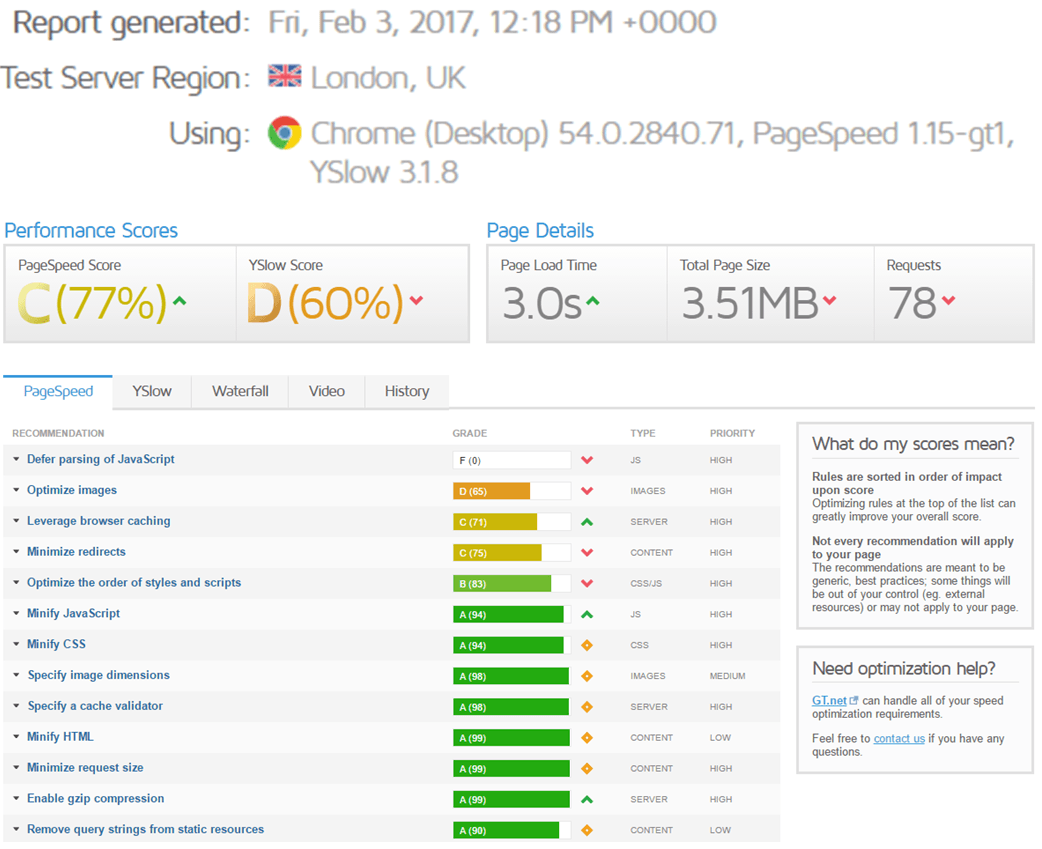
Key stats
- Test run: 12:18pm 3rd Feb 2017
- Pagespeed Score: C (77%)
- YSlow Score: D (60%)
- Page Load Time: 3.0 seconds
- Total Page size: 3.51MB
- Server Requests: 78
A side by side comparison:
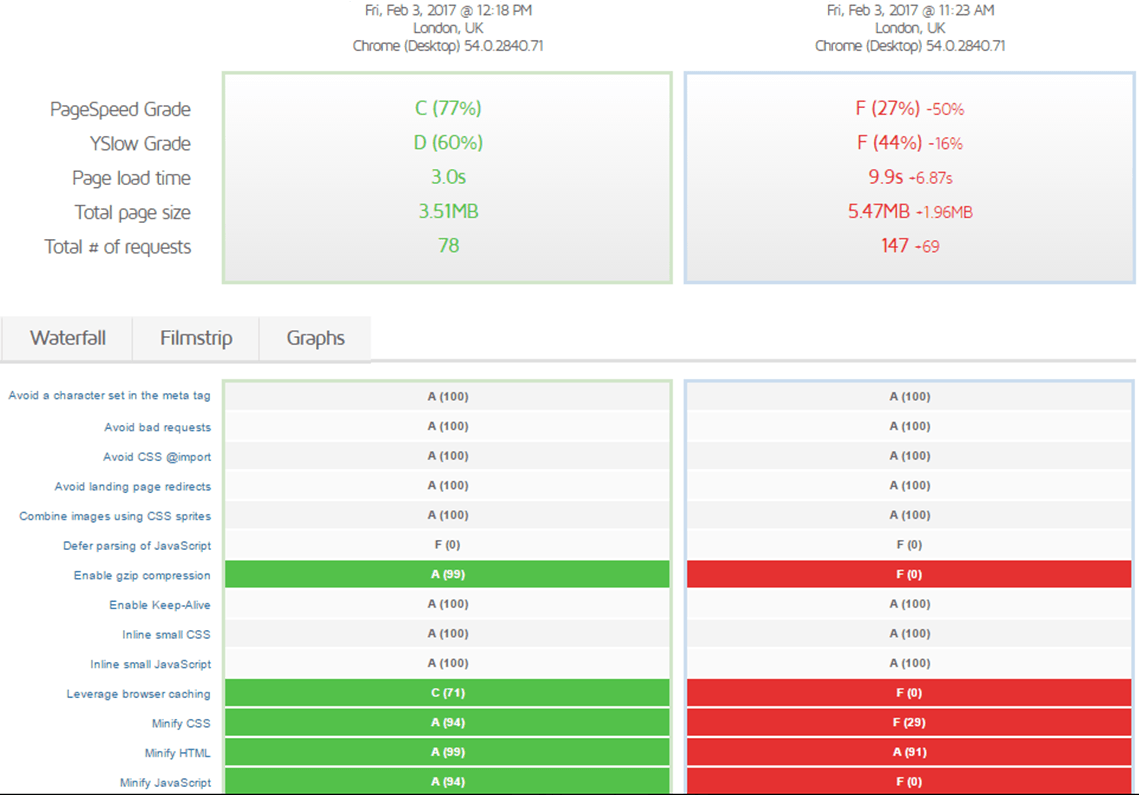
Properly configuring the W3 Total Cache plugin vastly improves our test site’s ability to minify JavaScript, HTML and CSS, leverage browser caching and compress resources.
Now are you convinced? Good! Without further ado, I’m now going to talk you through how to fix slow page loading time using a plugin called W3 Total Cache.
The Ideal W3 Total Cache Settings (with screenshots)
1. General Settings

Key Steps
- Enable ‘Page Cache’ with disk enhanced
- Enable ‘Minify’ with the default settings
- Enable ‘Database cache’ with default settings
- Check the box labelled ‘Optimise disk enhanced page and minify disk caching for NFS’
2. Page Cache Settings

Key Steps
- Tick the ‘Don’t cache pages for following user roles’ and then tick Administrator, Editor, Author, Contributor and Subscriber
- In the ‘Sitemap URL’ box, enter the correct address for your site’s Sitemap. This is usually /sitemap.xml or /sitemap_index.xml off the root domain but be sure to check first!
- Enable Compatibility mode – This is recommended by the plugin author to increase stability and prevent unforeseen errors. However it is not mandatory and it does decrease relative performance by around 20% in exchange for stability
3. Minify Settings
Leave as is. The developer of W3 Total Cache suggests that the preset configurations for minification, database and object caching do not need optimisation.
4. Database Cache Settings
Leave as is.
5. Object Cache Settings
Leave as is.
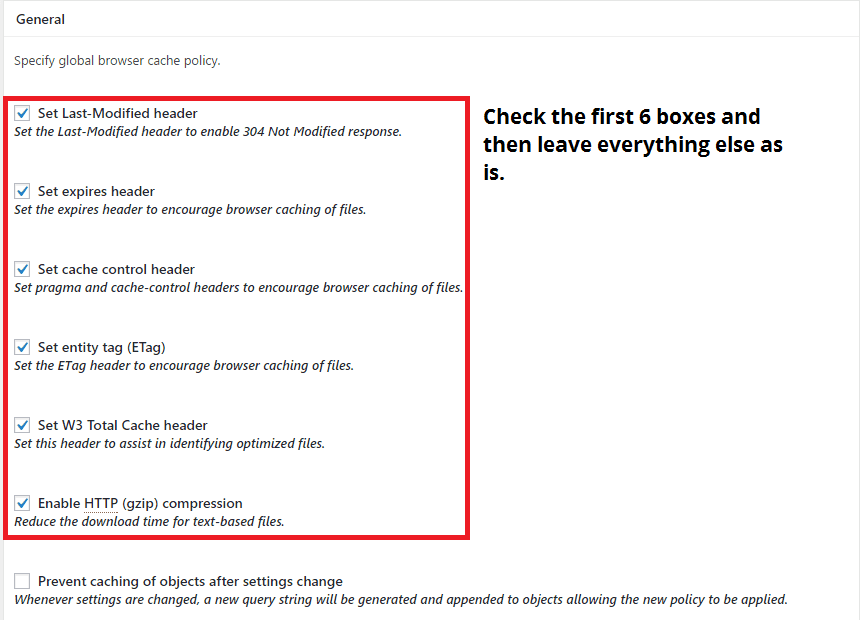
6. Browser Cache Settings
Key Steps
- Enable the first 6 checkboxes – these fix key problems identified on tools like GTMetrix.
- Everything else can be left as the preset configuration
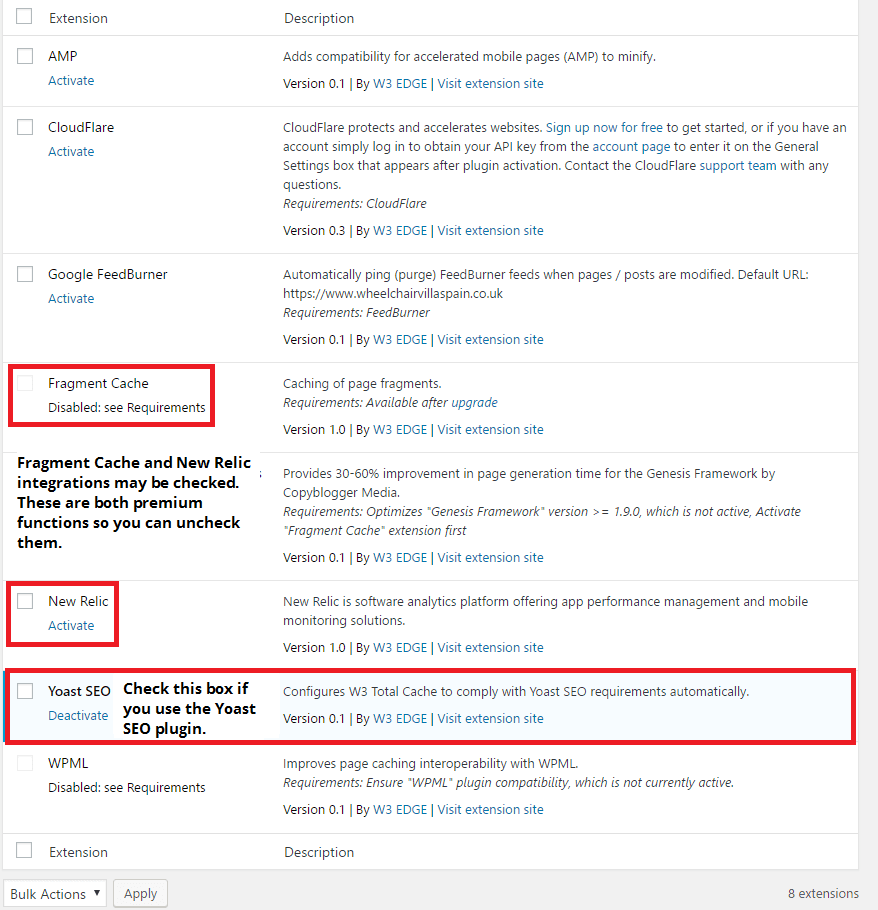
9. Extensions
Key Steps
A freshly installed version of the plugin might automatically activate the ‘Fragment Cache’ and ‘New Relic’ extensions. Fragment Caching is a paid upgrade within W3 cache and isn’t covered in this article so can be deactivated. New Relic is an app performance and mobile monitoring extension with niche functionality; this can also be deactivated if you wish. If like millions of Wordpress users you use the Yoast SEO plugin, you can enable the Yoast SEO extension within this tab.
And that’s it!
Those are the exact settings which helped catapult my test site from around 10 second load times to 3 seconds. I’m continuing to experiment with the plugin to try and draw more performance gains, and will update this article accordingly when I find them.
I would love to hear from anyone who has decided to try W3 Total Cache and the effect it had on your site speed. Please use the comments section of this post for anything you'd like to share. If you would like Fresh Egg to fix the page load speed on your WordPress site, you can contact us directly for a no-obligation chat..